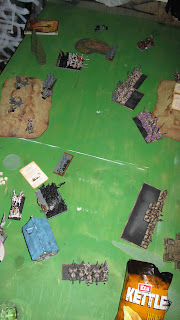
Disclaimer: I’m not usually a superstitious person, but in this game there was an area of the board (around the centre, more towards Sam) where an unusually high number of 6’s were rolled.
Case in point:
Sam rolled 3 6’s in a row on 3 different dice (to try roll a mission that wasn’t watchtower as I had just played that).
Then rolled 3 double 6’s in a row (2 ldship tests, then charge distance)
I IF’ed twice and ended up losing my mage to the warp when rolling in the area
Sam cast Ice blizzard instead of the re-roll 6’s spell. I then rolled lots and lots of 6’s to hit and wound with my white lions (rolling in that area).
+ camera batteries died end of first game, so apologies for not writing a “usual” battle report. There are some pics my mate took, but I didn't take "proper" notes, so I'll just include them mainly to show off how amazing my opponent's army looks.
So anyway my opponent finally rolled a 1, so straight up fisty cuffs.
His list was a bit of experimentation:
Lvl4: puppet, 4++, heavens
Lvl2: on disc that looks like win (fell beast with steed of slannesh head), 3++ vs shooting, tzeench
Bsb: steed, slannesh, book that has lvl1 in it (fireball)
2x40 maurders: FC
18 Slannesh warriors with Halberds and shields: FC
2x 5 Slannesh Dothraki with flails
6 Slannesh Chaos knights: m, sb, rage banner
Korn chariot
Warshrine
I had:
Lvl4: scroll, ruby ring
BSB: GW, Armour of Calador, dawnstone
35 Spears: FC, gleaming pendant
10 archers: M
13 Archers: M
23 Whitelions: M, SB-banner of sorcery
16 Swordmasters: M, SB-flame
T. Chariot
5 Dragon Princes
5 Reavors
2 RBT (MVP)
2 Eagles
We deployed. I deployed the eagles and reavors hard left with spears and shooting in the centre and everything else hard right. Game plan was to thin the maurder hordes with shooting to break in 1 round of CC. Weather the knights and deal to the warrior units as I usually do.
I made a HUGE mistake in deployment. In my zealous enthusiasm, I deployed my swordmasters 13 wide to get the chomp on the maurder horde it was opposite. HOWEVER this cramped my line, so when my diverting units came into play (and always blocked me) I couldn’t get them around. Oh well. Swordmasters are just huge targets anyway.
The huge line of Swordmasters lining up vs their intended target.
Basically my mage managed to display utter incompetence with 2 12 dice magic phases. Turn 1 only successfully casts a fireball and then IF’s miasma-becoming a lvl1. Turn 2 IF’s Pit (kills 6 maurders with it though) and sucks self into warp. Rest of game was a case of “what do I REALLY need to stop this phase?” Thankfully the scary spells were all direct damage, so staying in combat reduced the advantage.
The ebb and flow of the battle was rather unusual. My spears kept one of the hordes in check, finally taking it out in 2 rounds of Combat, and then beating the warriors, and the shrine. However in each case I failed to catch on pursue (rolling snake eyes twice-my phalanx prefers to hold the line), however the maurders + lvl4 managed to run off the board. Had I caught the warshrine and the 1 remaining warrior the game would have been a draw...oh well.
My fast calv and archers made short work of the Dothraki...s3 bow fire FTW. MY sustained RBT shooting also counteracted the lack of offensive magic, thinning the hordes and the warriors to manageable levels for my combat blocks to engage and beat.
The Swordmasters were a big deployment fail. IF I had stuck to plan and deployed 8 wide, I would have been able to get a crucial charge off. They ended game as a magic target, slowly dying to fireballs and flicker.
So my reformed swordmasters a turn too late :(
My use of chaff was also very poor given I removed Sam’s chaff from the game very early on. I opted to flee with my chariot when sacrificing it would have brought the warriors into easy charge range of my swordmasters. Also I gave up the eagles too cheaply. I think this was a symptom of deploying a very wide line when a more concentrated deployment would have been more efficient (esp as no warmachines to hunt).
The white lions were very, very good. They beat off one of the hordes (failing to catch though), then wore a flank charge from the Chaos knights who had shrugged off a charge from my dragon princes. I held and won the grind...my BSB pwns all.
White lions take out Kmau Though fail to run them down.
OR NOT.
My opponent played well given that no decisive combat that went his way. I had too many easy points to take (including the swordmasters) + I gave him my lvl4 for free. In total I ended up losing by around 500 points. A little frustrating given I beat off all his blocks and his knights, but that is the nature of the warriors; expensive unkillable characters and solid pricey support (and the ability to run to safety away from my pursuing units where necessary...or maybe that is just Slannesh).


No comments:
Post a Comment